Since I have been busy organizing, I get to SEE what I actually have.
In organizing my "baking" cabinet in the kitchen, I discovered that I had coconut.
Now, I knew I had coconut, but I could never really SEE it....hidden behind the flour and the sugar.
So I certainly wouldn't know that I had one bag that would expire in THREE days!
I was intent on finding THE perfect coconut cake.
So I turned to my Southern roots, after skimming several food sites.
I used the recipe for a Coconut Sheet Cake - with a few modifications, listed below....
3 large eggs
1 (8 oz) container of low-fat sour cream
1/3 cup water
1 (15 0z) can of cream of coconut
1/2 teaspoon vanilla
1 package of white cake mix
Beat the eggs at high speed with an electric mixer 2 minutes. Add sour cream, water, cream of coconut and vanilla, beating well after each addition. Add cake mix, beating at low until blended. Beat at high for 2 minutes. Pour batter into greased and floured pan.
Bake at 425* for 40-45 minutes or until a toothpick inserted in the center comes out clean. Cool the cake on wire rack. Cover with plastic wrap and place in freezer for 30 minutes. Remove from freezer.
Spread Coconut-Cream Cheese Frosting on cake. Store in the refrigerator.
The cake is super-dooper moist and yummy.
And I promise it tastes better after being in the fridge!
Enjoy!
****************************
Ooops, here is the recipe for the frosting!
Coconut-Cream Cheese Frosting
1 (8 oz) package cream cheese at room temperature
1/2 cup butter, at room temperature
3 Tablespoons milk
1 teaspoon vanilla extract
1 (16 0z) package powdered sugar
1 (7 oz) package of flaked coconut
Beat cream cheese and butter until creamy Add milk and vanilla. Beat well. Add sugar slowly, beating until smooth. Stir in coconut.
Spread over cake.
Showing posts with label recipe. Show all posts
Showing posts with label recipe. Show all posts
Thursday, September 23, 2010
Sunday, August 29, 2010
PW's Peach Crisp
I have so many things to share with you!!
I am going to try my hardest to catch up you to speed this week, so please please bear with me!
First and foremost, I want to share a recipe with you from the Pioneer Woman.
Can we say Hello Momma?!
Words cannot describe how delicious it was. And I say WAS, because this is all that is left:

I made her Peach Crisp with Maple Creme Sauce.
We actually wanted ice cream too (my husband believes a day is not complete without ice cream), so I opted to ignore the Maple Creme Sauce.
I truly believe the vanilla ice cream mixed with every bite made it all the better.
You have to try it!
Super simple to make, and even more delicious!
Now excuse me while I take that very last bite!
Wednesday, August 25, 2010
Peach Streusel Pie
We went peach picking....

And ended up with 6 pounds of these beautiful fruits...

But that wasn't enough to make anything sweet, because we gobbled every single one.

So after heading back to the orchard, I collected 3 pounds of peaches to make a pie for my hubby.
The peaches were so amazingly sweet, I didn't want a lot of extra ingredients to take away from the natural flavors.
After much searching, I found this recipe for a Peach Streusel Pie.
I used Paula Deen's pie crust recipe because I know it is no fail!
Together, the two were just amazing.
Amazing I tell you!

Here is the recipe!
You can click on the title for direct access to the website!
Peach Streusel Pie
Ingredients
1/4 cup walnuts, finely ground in a food processor
1/4 cup pecans, finely ground in a food processor
1 cup flour
1/2 cup dark brown sugar
1/4 teaspoon salt
8 tablespoons unsalted butter, melted
3 pounds ripe peaches (about 8), peeled and sliced (see Notes)
About 1 tbsp. sugar
1 tablespoon quick-cooking tapioca (see Notes)
1 disk (1/2 recipe) Best Basic Pie Crust Dough
Preparation
1. Put an oven rack in the middle position and preheat oven to 350°. Stir together walnuts, pecans, flour, brown sugar, and salt in a small bowl. Add butter and stir with a fork until mixture forms small clumps (break apart any large clumps with your fingers). Set aside.
2. Gently mix peaches, sugar, and tapioca in a large bowl. Taste and add additional sugar if you like. Set aside.
3. Dust your counter and rolling pin with flour. With short strokes from center outward, roll dough into a 12-in. circle (about 1/8 in. thick), turning 90° after every 3 or 4 passes of the rolling pin to keep it from sticking. Transfer dough to a 9-in. deep-dish glass pie plate, letting it fall into place (if you push or stretch the dough, it will shrink back when baked). Trim overhang to 1/2 in., tuck edge under, and crimp edge. Pile peaches into crust, then top with streusel.
4. Put pan on a rimmed baking sheet and bake until topping and bottom crust are well browned, about 1 hour. Let cool to room temperature, at least 2 1/2 hours, before serving.
Sunday, May 30, 2010
Pulled Pork with Strawberry BBQ Sauce
I am always looking for reasons to use my super cool cast iron dutch oven...
and having about 9 more pounds of strawberries had me searching my recipes.

In my notebook of "Recipes to Try One Day", I remembered a recipe from Better Homes & Gardens:
I purposely froze diced strawberries to make this and fit it into our meal schedule!
With a 3.5 lb pork tenderloin, trim off the excess fat along the back.
I

Heat your oil in your dutch oven, and heavily salt and pepper your tenderloin on all sides.
Brown on all sides.

Grab your essential ingredients for making BBQ sauce -
ketchup. Heinz only please.
Apple Cider Vinegar.
Garlic.

Once your meat has been browned, it will look quite beautiful...

Add your ketchup, vinegar, garlic and strawberries...

Cover and let everything mingle for a couple of hours....

After several hours, the pork will have cooked through, tenderized and soaked up the flavors...

Amazingly delicious I tell you!
Sorry for the lack of photo after everything was pulled and plated!
The recipe follows!
(adapted from BHG)
1 tsp salt1/2 tsp ground black pepper
1 TBL cooking oil
4 cups strawberries, halved or quartered
1/2 cup ketchup
1/4 cup cider vinegar
4 garlic cloves, minced
Directions
Trim fat from pork.
Sprinkle pork with salt and pepper.
In large Dutch oven over medium heat brown pork in hot oil on all sides.
Add half the strawberries, the ketchup, vinegar, and garlic.
Bring to boiling; reduce heat. Simmer, covered, 2 hours or until pork is tender.
Remove pork from Dutch oven; loosely cover with foil. Let stand 10 minutes.
For strawberry BBQ sauce, skim fat from cooking liquid.
Return liquid to Dutch oven; bring to boiling.
Reduce heat.
Simmer, uncovered, 8 minutes or until reduced to about 2 cups.
Using two forks, shred pork; discard fat.
Stir 1 cup strawberry BBQ sauce into pork.
Stir remaining strawberries into BBQ sauce.
Serve pork on buns.
Monday, May 24, 2010
Strawberry Cake!
At a birthday party, I had a homemade Paula Deen Strawberry Cake.
But something about it wasn't "right".
The cake was heavy.
The icing was too rich.
The cake was still yummy, but not "I've died and gone to heaven!"
And I wanted to achieve that...
I searched one of my go-to recipe sites - www.myrecipes.com
This site is a collection of recipes from the makers of Southern Living, Cooking Light, Coastal Living and all the magazines that fall into similar categories.
The recipe for Fresh Strawberry Cake just felt like a winner!
The strawberry content was high.
The cake only used 3 egg whites (not 4 whole eggs like the PD recipe and made it heart healthy and light!).
The icing was cool whip!
All around it seemed perfect.
The cake certainly looked perfect.

I began with my yummy strawberries!

I pureed fresh strawberries (instead of using frozen strawberries).
I fully believe that this helped add to the yummy rich flavor of the cake.

I had a photo of the cake after it cooked, but I do not know what happened to them!
(I am not at my own computer and will not have access for several weeks!)
Anywho, the cake looked amazing without the cool whip and berries!

I pureed strawberries and stirred in with the cool whip for the icing.
Such a wonderful idea!

The cake was moist and smooth.
The whipped topping added a hint of sweetness without overpowering the depth of the strawberries.
The almonds were the perfect compliment to the yummy goodness.
And with each bite, I really did feel as if I had died and gone to heaven.
Trying this recipe, you will not be disappointed.
Fresh Strawberry Cake
(adapted from myrecipes.com)
Ingredients
2 cups of fresh strawberries, pureed
1 package of white cake mix
1 (3 oz) package strawberry gelatin
1 1/4 cups cold water
1/4 cup vegetable oil
3 large egg whites
1/2 teaspoon vanilla extract
1/4 teaspoon almond extract
cooking spray
1 (8-ounce) container frozen fat-free whipped topping, thawed
3-5 fresh strawberries, sliced
2 tablespoons sliced natural almonds, toasted
Preheat oven to 350°.
Puree the 2 cups of strawberries. Set aside.
Combine cake mix and next 4 ingredients in a large bowl; beat with a mixer at low speed 30 seconds.
Add 1 1/2 cups of pureed strawberries; beat at medium speed 2 minutes.
Stir in vanilla and almond extracts.
Pour into two 8" round cake pans coated with cooking spray.
Bake at 350° for 28 minutes, or until cake springs back when lightly touched in center.
Cool completely in pan before removing.
Add 1/2 cup pureed strawberries to the thawed whipped topping.
Spread whipped topping over top of cake. Place 2nd round on top. Spread whipped topping around entire cake.
Arrange sliced strawberries on whipped topping, overlapping slightly.
Sprinkle almonds over cake.
Enjoy!
Friday, May 21, 2010
Strawberry Puree!
Fresh strawberries will keep longer if you:
1) Do not wash until you are ready to eat
2) Do not cut the strawberries until you are ready to use
Keep this in mind when you put them in the fridge!
I wanted to puree strawberries for a recipe (I will be posting later).
I am going to show you how to do it.
Rinse well, and cut off the green tops.

Separate according to 1 cup portions to give you an idea of what you are working with...
1 cup of whole strawberries is not the same as 1 cup pureed strawberries.
I am thinking it was 1 1/5 cups of whole strawberries equates to 1 cup pureed.

Enlist the help of your children to help slice.
Wait!
Children shouldn't use knives!

No worries, he is using a child safe butter knife!
Throw your strawberries in the blender and push the puree button.
The blender knows exactly what to do!

Once you have a liquid, you can use it as you please!
Recipes for baking!
Pour over angel food cake or french toast!
I also wanted to freeze some puree for later.
I had already planned what I would be using it for later.
*MOST* recipes call for 1 1/5 cups puered strawberries.
My recipes called for 2 cups.
I measured 2 cup portions and placed into freezer bags.
Flatten the bag and smoosh the puree around, leaving room for expansion as it freezes.
Your finished product will look like this!

Find a flat object in your freezer and place on so the bag will retain its flat shape.
This is a fabulous space saving tip!
There are a few cookbooks that encorporate pureed goods into the recipes for an added health benefit.
You puree any food in the same manner!
I own Deceptively Delicious (Thanks Lindsay!)
My friend Paige lives by The Sneaky Chef.
Check them out at your local library and let me know what you think!
Thursday, April 15, 2010
Pom Poms and Punch
I am somewhat of a collector of things.
I found this Tissue Paper Pom-Pom Kit on super clearance shortly after Meredith was born (2 years ago people).

I knew then, that it would be a great thing to incorporate into a party for her one day!
So I took it home.
You can read about them on Martha Stewart's website HERE.
I had even picked up some lavender tissue paper to use as well.
Unfortunately, I didn't begin working on them until around midnight, before
The "fluffing" took A LOT longer than I anticipated...
I have serious perfection issues, so I didn't want to begin making another one...
So this is the only one I accomplished...

And it looked nice until it fell..and a little child began running around with it...
and well tissue paper balls and children spell disaster.
But on to other news, we had PINK PUNCH.
In trying to find a recipe, I transposed ingredients across several recipes and ended up not buying the "right" ingredients.
(I am terrible about taking lists to the store).
Our test punch ended up being liked by all and so you get the recipe!
Pink Princess Punch!
1 2L Cherry 7-Up
1 qt Raspberry Sherbert
Place Sherbert in a punch bowl. Cover with 7-Up!
Let the flavors marry for about 20 minutes before serving.
Enjoy!
Wednesday, April 14, 2010
Peep Krispie Treats Recipe!
A mouse got into my peeps!

Actually, my kids decided they didn't like peeps!
And taking from the persistence of me, they kept trying to eat them again and again...
What kid doesn't like Peeps?!
Especially ones who LOVE marshamallows!
So I decided to try them out for Mere's party to make Rice Krispie Treats with Peeps!

I found this recipe but I didn't have enough PINK Peeps to fulfil the recipe.
So I modified and tried my own method...

I let everything melt over medium low heat, to create lovely pink mess of marshmallow...

Then I stirred in 4 cups of rice krispies.

I pressed them into a dish, and they were so pretty and sparkly.
Thank you pink sugar crystals!

And they fit in perfectly with the pink theme of the party!
They were not sweeter than typical Rice Krispie Treats, and were quite yummy.
Read below for the full recipe!
Peeps Krispie Treats
3 TBL butter
24 Peeps (any color, all one color, or a rainbow of colors!)
6 cups of Rice Krispie Cereal
Heat a large pot over medium low. Add butter and marshmallows and stir until completely melted.
Marshmallows burn quickly, so please continue to stir!
When melted, remove from heat and pour in 6 cups of cereal. Stir until coated with marshmallows.
Pour into a buttered 9x9 dish. Wet your hand under cold water and push the treats into the dish. Let set for a few hours before slicing.
*Tip* If you keep cold water running, you want actually dip your hand under the water and then pull the krispies "stuck" in the pot out without burning yourself. Wet, pull out, wet again. Use this same method to push into the dish without getting it stuck to your fingers!
Enjoy!
Cake Mix Cookie Recipe!
Since we were having an Abby birthday party, I envisioned all the desserts being pink!
We made the perfectly delicious strawberry cookies shown below...

The first time I ever made these was for an Army function.
I needed something to take, and I didn't have a lot of time.
I did have a chocolate cake mix, oil and eggs.
I thought why can't I make cookies out of these?
After a search online, which pulled up a sea of recipes, I chose one I most liked.
Straight from Betty Crocker herself, this is what I did...

1 box cake mix any flavor (forgive me for not getting BC, this was onsale for $0.88)
2 large eggs
1/3 cup of oil
(The recipe says vegetable oil, which i never buy because i don't fry things. The canola oil was substituted and worked wonderfully!)

So easy, that I let my almost 2 year old do all the steps!
Pour your cake mix in the bowl.
Add oil and 2 eggs and mix together until well combined.
I used my electric hand mixer, not the spoon as shown above.
Place teaspoons on a cookie sheet.
In a preheated 350* oven, bake cookies for 8 to 10 minutes.
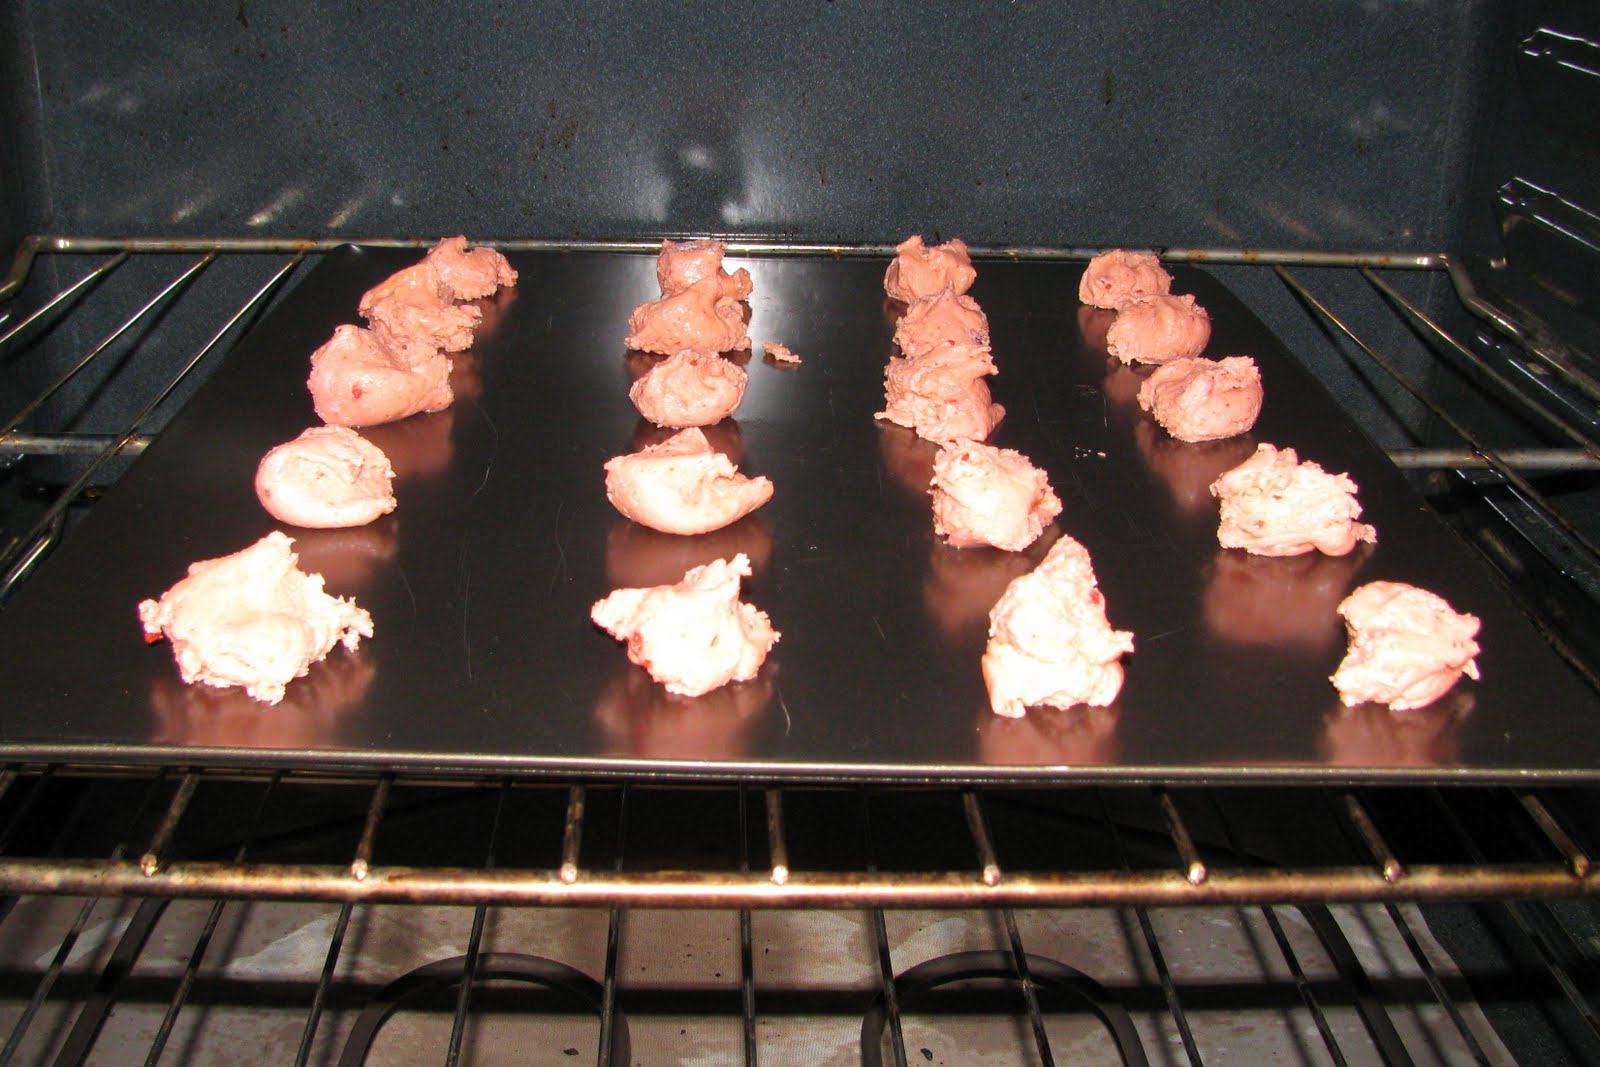
And you will end up with this!

They are so moist and full of flavor.
You have to try it!
I LOVE doing this with my kids because there are no dry ingredients to measure.
Low stress, low mess.
I have written the recipe below!
1 box of cake mix, any flavor
2 large eggs
1/3 cup oil
Preheat oven to 350*
Pour cake mix in a bowl. Add eggs and oil. Beat with mixer for 2 minutes or until combined well.
Add teaspoonsof cookies to a cookie sheet about 2 inches apart.
Bake for 8 - 10 minutes.
Yields: 48 cookies!
Friday, April 2, 2010
Easy Citrus Fish!
We LOVE eating fish in our home.
I try to encorporate fish at least once a week....
The health benefits are amazing....necessary vitamins, minerals and of course, those Omega-3's.
Fish prevents heart disease, reducing the risk of heart attacks and strokes.
Fish lowers blood pressure.
Fish helps reduce depression.
Fish is low in fat.
Fish has strong levels of protein.
I could go on, but I think you get the picture! You NEED to eat more FISH!
It is near impossible to find WILD SALMON in the stores around here.
Otherwise, we buy TILAPIA or CATFISH.
I know a lot of people are afraid of cooking fish.
So I am here to help!
I have a seasoning called "Grill Creations Citrus Grill" by Durkee.
This stuff is awesome.
(I have also seen seasoning specifically for "fish" or "salmon" -- I am certain this would be fine too!)
You can put it on fish or chicken.
Salmon is awesome with it.
I have even seasoned green beans with it before.
We had Tilapia this week.
Want to try it?
First, line your dish with foil.
This will help your clean-up later!
Take your fish of choice and season on both sides...

Bake in the oven for 20 minutes at 425*.
The fish will be moist and delicious and golden brown.

Sorry for the awful photo, this is the aftermath of dinner...
I have two more go-to recipes for fish that I LOVE, but this one is by far the simplest one!
I hope you try it!
Subscribe to:
Posts (Atom)