I haven't posted in a while.
You can read about why HERE.
I will be back soon, I promise.
I have finally gotten all of my fall decorations out.
Typically, I do it in September....but don't critisize, I am running a little behind this year.
Thursday, November 11, 2010
Sunday, October 24, 2010
Shout Out Sunday
I absolutely have to share these products with you.
They are AMAZING!
Just amazing.
Essentially, these are free endorsements from me!
I have talked to you before about our love for fish.
Last month, we discovered Parmesan Crusted Tilapia from Treasures from the Sea. 

Typically, I stray away from most premade food, but these seemed to pass the test.
Straight from the freezer to the oven, no thaw out necessary.
And they are incredibly delicious.
I can't even describe how flavorful they are, you just HAVE to try them.
We purchased them at Sam's, but they may be available in other stores.
***********
We tried tortilla chips by Archer Farms (Target).
We bought the Multi-grain Tortillas for about $2.50.
They are cheaper than national brands and are far superior.

The multi-grain includes corn, brown rice, flax seeds, sesame seeds and sunflower seeds.
Flax seeds provide Omega-3 (like fish!).
The chip has just a hint of salt, but not too salty
(which is something I hate about national brand tortilla chips.)
They are crispy and study, and fabulous for dipping.
******************************************
Are there any products that you have added into your grocery cart that you love?
Tuesday, October 19, 2010
Dining Chair Dilemma
Several months ago, I recovered our dining room chairs in attempt to save the cushion from liquid spills.
You can read about that process HERE.
The short of it, is I choose a new and heavier upholstery fabric.
BETWEEN the old and new fabric, I put vinyl - like that commonly used in restaurants.
I never thought my idea was so brilliant until a few weeks ago.
My son brought a stomach bug home from pre-school. A stomach bug that I did not discover until we were eating lunch.
I had my children nibble on string cheese and yogurt while I was making the main entree.
Before my son could finish his yogurt, his clothes, the counter and my DINING CHAIR were covered in vomit.
I stripped him, thew his clothes in the kitchen sink and jumped to clean up the vomit on the floor before our doggie could clean it up for me.
After a quick bath and new clothes, I returned to the kitchen wondering what comes next.
I was convienced the chair was ruined, and I would have to figure out how to replace an entire cushion.
I took a deep breath, grabbed the screwdriver and got to work.
After the cushion popped off, I undid the staples on the bottom and ripped off the fabric.
The fabric had "leaked" quite a bit and underneath, I remembered WHY I put the vinyl on in the first place!
With a wet rag and some disinfecting spray, the chair was perfectly acceptable again!
The vinyl had prevented any liquid from soaking through any further.
For now, the chair remains "naked" with only the vinyl.
********
And I recently discovered other products that could be used in place of the vinyl - which are a lot prettier.
Both Laminated Cotton and Oil Cloth are available online and in fine fabric stores (a place like JoAnn's won't have this in stock).
Here are a few projects that have been done with oilcloth.
Check out these Lunch bags and Chair covers!
Wednesday, September 29, 2010
Non-Update
I have a gazillion of things that I could share with you.
Recipes are piled up in front of my computer.
Projects are getting forgotten about as the days pass.
However, it is hard to keep up with a blog if I feel like there is no genuine interest.
And I can only assume that there is no interest because no one EVER (and I really mean NEVER) comments.
You see I am a "words of affirmation" gal. And without the affirmation, there is no will to continue what has become a daunting task.
And believe you me, I have a gazillion things I could be doing at any minute of the day.....straight down to just sitting on the couch and watching Dora the Explorer.
Where I used to blog before washing dishes or folding clothes....I am now choosing those tasks over making time to write or upload photos. Even alphabetizing my canned goods is higher on the list.
So here I am giving you a non-update. Or rather telling you that there will be no more updates unless I feel like I have to share something with you.
Until then, I hope you enjoy the wonderful fall weather!
Thursday, September 23, 2010
Coconut Cake With Coconut Cream Cheese Frosting
Since I have been busy organizing, I get to SEE what I actually have.
In organizing my "baking" cabinet in the kitchen, I discovered that I had coconut.
Now, I knew I had coconut, but I could never really SEE it....hidden behind the flour and the sugar.
So I certainly wouldn't know that I had one bag that would expire in THREE days!
I was intent on finding THE perfect coconut cake.
So I turned to my Southern roots, after skimming several food sites.
I used the recipe for a Coconut Sheet Cake - with a few modifications, listed below....
3 large eggs
1 (8 oz) container of low-fat sour cream
1/3 cup water
1 (15 0z) can of cream of coconut
1/2 teaspoon vanilla
1 package of white cake mix
Beat the eggs at high speed with an electric mixer 2 minutes. Add sour cream, water, cream of coconut and vanilla, beating well after each addition. Add cake mix, beating at low until blended. Beat at high for 2 minutes. Pour batter into greased and floured pan.
Bake at 425* for 40-45 minutes or until a toothpick inserted in the center comes out clean. Cool the cake on wire rack. Cover with plastic wrap and place in freezer for 30 minutes. Remove from freezer.
Spread Coconut-Cream Cheese Frosting on cake. Store in the refrigerator.
The cake is super-dooper moist and yummy.
And I promise it tastes better after being in the fridge!
Enjoy!
****************************
Ooops, here is the recipe for the frosting!
Coconut-Cream Cheese Frosting
1 (8 oz) package cream cheese at room temperature
1/2 cup butter, at room temperature
3 Tablespoons milk
1 teaspoon vanilla extract
1 (16 0z) package powdered sugar
1 (7 oz) package of flaked coconut
Beat cream cheese and butter until creamy Add milk and vanilla. Beat well. Add sugar slowly, beating until smooth. Stir in coconut.
Spread over cake.
Thursday, September 16, 2010
Preschool Painting
My kiddos LOVE to paint.
LOVE it!

Painting is the only activity that will hold their attention longer than 15 minutes.
And painting may seem daunting to you.
The supplies to drag out. The mess to clean up.
But if you do it right, painting can be a great creative outlet for your kids.
Have supplies on hand and easy to grab so you can entertain your kids while you make dinner.
In my craft closet, I have a basket that I fill with items we are currently working on.
You can see more about the craft closet here.
I have a small tin to hold brushes.
I purchased it at Michael's from the $1 bin.

I have paint.
Washable paint.
I used to let the kids dip from these big jars of paint....but I learned quickly...

I refill these little painting pods with the paint.

Each child can use an aray of colors without me monitoring how much paint they take out.
I just grab these out of the basket with the brush tin.
We wear old T-shirts as "painting shirts" just in case,
so we don't have to worry with paint getting on clothes and getting on furniture.

And just like that, my kiddos are happy and distracted so I can create our dinner!
Are there any quick tips that you have to making life easier with your kiddos?
Do you let your kids paint?
Tuesday, September 7, 2010
A bed for a boy
Toward the end of August, my husband and I built my 3-year-old a bed for his new twin mattress!

We found a plan off the Knock-off Wood site, where I found the plans for the Toddler sized picnic table that I built.
Her site is now: http://www.ana-white.com/
We chose Ana's Brookstone Storage Bed and Headboard.
I began to post the process on my family's blog, where you can see the details!
I have posted final photos HERE.
The process of building the frame HERE.
The process of building the headboard HERE.
Let me know what you think!
Saturday, September 4, 2010
Elevated Dog Bowl
Our first "child" joined our family six years ago this month.
Dixie was actually our test child.
She doesn't get as much attention as she used to, but we still try to include her in family activities.

Unfortunately, we have neglected her in other ways.
She has been eating out of this elevated bowl since she was a little puppy.

For a dog her size, the elevation should be a lot taller!
When bending over to to eat, dogs tend to ingest a lot of air with their food...and we all know what excess air leads to! Besides that, having their bowls elevated eases strain on muscles and joints.
In order to determine the proper elevation for your dog, in a standing position,
measure to the shoulder of the dog and subtract 6 inches.

Both my husband and I did an extensive search for the feeder size that we needed.
Richard's jaw dropped at how expensive they were!
$100 dollars or more, plus shipping.
So we took matters into our own hands and drew up a blueprint to a wooden feeder for Dixie!
I am going to share the loose instructions with you, so you can modify them to your own specifications.
We needed a feeder 18 inches high. (24" shoulder height minus 6 inches).
When making this measurement, include any additional height added from the bowls
if they do not lay flush in the wood.

Our bowls were 6" square across the top.
We wanted 2" between the two bowls and around all sides.
We decided a 5" square in the wood would hold the bowl properly
( 1" of the bowl is showing above the wood).

The same calculations can be made using the diameter of a circular bowl.
With all that considered, we needed a 1x10x6 piece of wood.
The top board was 17" across.
We drew the squares for the bowls in the proper location.

Then drilled holes in all corners and in the center of each line to prepare the for the jigsaw.

I have no photos of the jigsawing, but once the holes were removed, the legs were attached.

We let Dixie try it out, and it seemed TOO HIGH for her.
After remeasuring, we didn't account for the height added by the bowls, or the wood with the legs
After remeasuring, we didn't account for the height added by the bowls, or the wood with the legs
(ie. my husband cut the legs to the height we needed)

So my husband took his saw and cut 2" off the bottom to take it to the proper 18" measurement.
He also added a cross support along the bottom.
Dixie is much happier with the feeder now!

I stained the feeder with one coat of Minwax English Chestnut.

And the entire project was about $7!
If you have any questions, please let me know!
Sunday, August 29, 2010
PW's Peach Crisp
I have so many things to share with you!!
I am going to try my hardest to catch up you to speed this week, so please please bear with me!
First and foremost, I want to share a recipe with you from the Pioneer Woman.
Can we say Hello Momma?!
Words cannot describe how delicious it was. And I say WAS, because this is all that is left:

I made her Peach Crisp with Maple Creme Sauce.
We actually wanted ice cream too (my husband believes a day is not complete without ice cream), so I opted to ignore the Maple Creme Sauce.
I truly believe the vanilla ice cream mixed with every bite made it all the better.
You have to try it!
Super simple to make, and even more delicious!
Now excuse me while I take that very last bite!
Wednesday, August 25, 2010
Peach Streusel Pie
We went peach picking....

And ended up with 6 pounds of these beautiful fruits...

But that wasn't enough to make anything sweet, because we gobbled every single one.

So after heading back to the orchard, I collected 3 pounds of peaches to make a pie for my hubby.
The peaches were so amazingly sweet, I didn't want a lot of extra ingredients to take away from the natural flavors.
After much searching, I found this recipe for a Peach Streusel Pie.
I used Paula Deen's pie crust recipe because I know it is no fail!
Together, the two were just amazing.
Amazing I tell you!

Here is the recipe!
You can click on the title for direct access to the website!
Peach Streusel Pie
Ingredients
1/4 cup walnuts, finely ground in a food processor
1/4 cup pecans, finely ground in a food processor
1 cup flour
1/2 cup dark brown sugar
1/4 teaspoon salt
8 tablespoons unsalted butter, melted
3 pounds ripe peaches (about 8), peeled and sliced (see Notes)
About 1 tbsp. sugar
1 tablespoon quick-cooking tapioca (see Notes)
1 disk (1/2 recipe) Best Basic Pie Crust Dough
Preparation
1. Put an oven rack in the middle position and preheat oven to 350°. Stir together walnuts, pecans, flour, brown sugar, and salt in a small bowl. Add butter and stir with a fork until mixture forms small clumps (break apart any large clumps with your fingers). Set aside.
2. Gently mix peaches, sugar, and tapioca in a large bowl. Taste and add additional sugar if you like. Set aside.
3. Dust your counter and rolling pin with flour. With short strokes from center outward, roll dough into a 12-in. circle (about 1/8 in. thick), turning 90° after every 3 or 4 passes of the rolling pin to keep it from sticking. Transfer dough to a 9-in. deep-dish glass pie plate, letting it fall into place (if you push or stretch the dough, it will shrink back when baked). Trim overhang to 1/2 in., tuck edge under, and crimp edge. Pile peaches into crust, then top with streusel.
4. Put pan on a rimmed baking sheet and bake until topping and bottom crust are well browned, about 1 hour. Let cool to room temperature, at least 2 1/2 hours, before serving.
Thursday, August 19, 2010
Faucet Upgrade
We have been doing a great deal of work around our home lately.
The most recent addition is a kitchen faucet.
I looked high and low for a "before" photo, but cannot find it...
But we had a builder's grade faucet that had begun to change colors.
After much shopping, we chose something way cooler.
We let the hot hubby do all the hard work, like read the directions.

I did the easy work, like push the actual plumbing tubes down the hole.
Don't be confused though, the hard part of tightening everything has to be left for the hot hubby.

Screwing things is such hard work that shirts have to be removed.
But alas, we have a brand new faucet.

I never thought that something like this would truly improve my life....
But it does...
I have never been so inspired to keep my kitchen clean!
Have you made any changes recently that left you saying "Wow! Why didn't I do this sooner?"
Do tell!!
Sunday, August 15, 2010
Oh Crap!
One of the blogs that I obsessively read has offered a challenge. I am a little behind on announcing that I am doing this, but I have been working on her challenge:
A "Get the Crap out of my House" Challenge

I have been wanting to eliminate the crap for such a long time. I have such trouble moving stuff OUT of the house though.
I have the mentality that we MAY use or need the item again. (i.e. baby gear, etc.)
But that is another post for another time....
I am however, using this post as a public announcement for decluttering and moving crap out of my home.
That way all of you can hold me accountable....
I have cleared the clutter from my dining room/toy room. The room is currently closer to a ONLY dining room again. No more scrapbooking stuff on the dining table, no more random crap on the floor.
We sorted through the toys in our living room's storage ottoman.
All of the things that aren't being played with or are no longer age appropriate have been removed.
We have cleared the clutter from all flat spaces in our home, desk, server, countertops.
I am going paperless on all of my bills/statements. The only reason I am not already is because I like to receive snail-mail. And that is a super-lame reason.
I am relieved at the amount of clutter this will reduce, because that means no more piles of unnecessary things I have to file or shred!
I have committed to working around my house slowly and seeing that I can remove.
I am cleaning out drawers, one day at a time.
Do you feel like your house is overrun with crap?
Let's commit to removing it together!
A "Get the Crap out of my House" Challenge
I have been wanting to eliminate the crap for such a long time. I have such trouble moving stuff OUT of the house though.
I have the mentality that we MAY use or need the item again. (i.e. baby gear, etc.)
But that is another post for another time....
I am however, using this post as a public announcement for decluttering and moving crap out of my home.
That way all of you can hold me accountable....
I have cleared the clutter from my dining room/toy room. The room is currently closer to a ONLY dining room again. No more scrapbooking stuff on the dining table, no more random crap on the floor.
We sorted through the toys in our living room's storage ottoman.
All of the things that aren't being played with or are no longer age appropriate have been removed.
We have cleared the clutter from all flat spaces in our home, desk, server, countertops.
I am going paperless on all of my bills/statements. The only reason I am not already is because I like to receive snail-mail. And that is a super-lame reason.
I am relieved at the amount of clutter this will reduce, because that means no more piles of unnecessary things I have to file or shred!
I have committed to working around my house slowly and seeing that I can remove.
I am cleaning out drawers, one day at a time.
Do you feel like your house is overrun with crap?
Let's commit to removing it together!
Monday, August 2, 2010
Go Fish!
Many months ago, I told you about the importance about eating fish.
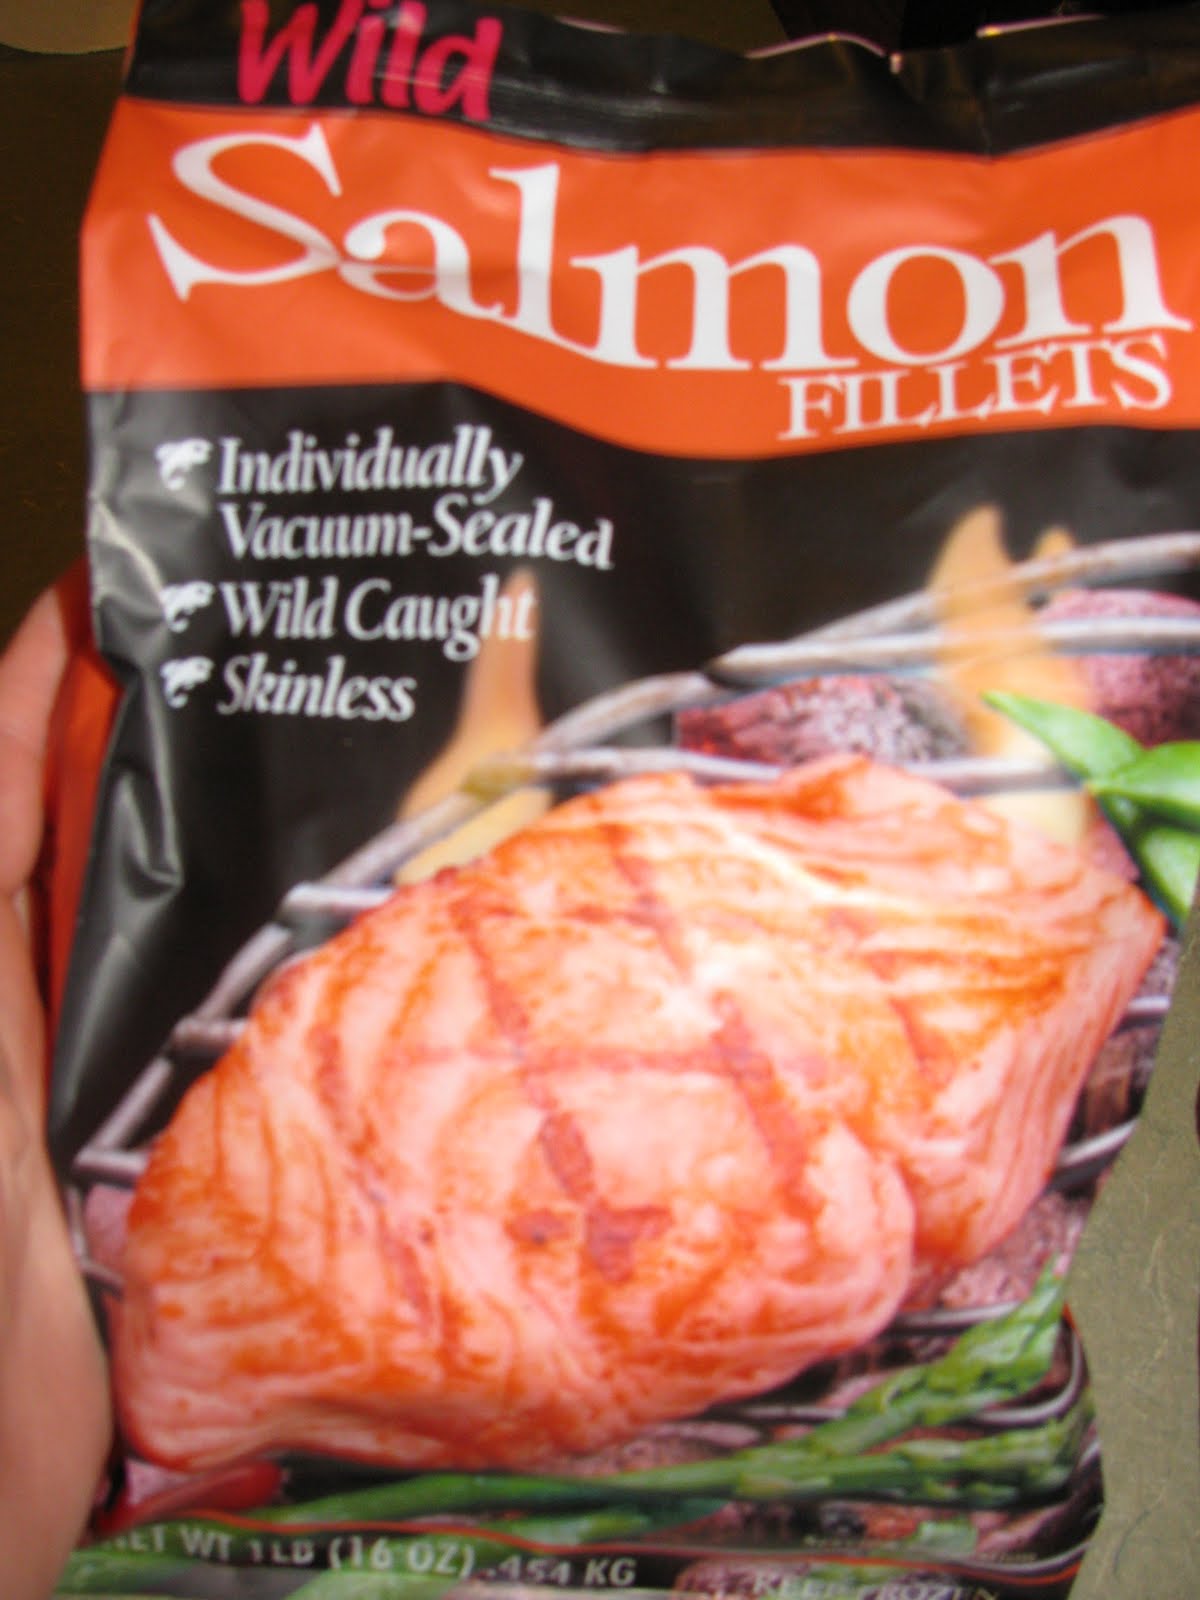
I also told you about eating WILD SALMON, and how difficult it was for me to find!
Well look what I found in Wally World, that was not priced to the moon (like in the ritzy grocery stores)!
This summer, I also had the pleasure of getting a pocket seafood guide.
The guide is sponsored by the Monterey Bay Aquarium.
The guide is a mini-accordion pocket guide that lists the fish which are safe to eat for you and the environment.
The fish will contain low mercury levels and are obtained from methods of fishing that are not depleting the fish population or harmful to other sea creatures.
The guide is separated into three categories: red, yellow, and green.
Seafood choices under the red category should be avoided, the yellow category can be eaten in moderation, and the green category should be the FOCUS of your consumption.
You should make sure that you have an updated version of the guide for your region whenever you buy fish.
I currently live in the Southeasten portion of the country, so the focus of my fish diet should include the fish I first told you we eat regularly -
CATFISH (US farm-raised), TILAPIA (US farm-raised, WILD SALMON (Alaskan).
Please go HERE to download and print your own pocket guide for seafood.
You will help sustain the fish population and help your health!
Tuesday, July 27, 2010
Neglect
Over 20 days have passed since my last post.
I have neglected my faithful readers.
I am willing to admit that I have been a domestic failure as of late.
I spent the past few months living life...
without cleaning a single toilet or cooking a delicious meal.
I have thrown all crafting by the wayside, and long-forgotten about half-finished crafts.
How do my blog, cleaning, cooking and cleaning all fall from the center of my world you ask?
After all, all of those things make my world go around.
Well, my husband was working away from home for the summer and we traveled along with him!
We lived in an extended stay hotel near his place of buisness.
We ate out for nearly every meal.
I have been spoiled.
After some time, you become used to not cooking and cleaning.
And you lose the desire to do so once you realize how much more free time you have....
I secretly pretended I was living the life of the rich and famous.
Not really....
Although this seems like a sweet deal, we all grew tired of the lifestyle....
the constant restaurant meals, the lack of space, sharing a bedroom with the kids, the ability to wash clothes freely...
Bittersweetly, we are glad to be back in our house.
I randomly posted thingsin the passing weeks to keep you guys interested.
Yet, lately, the level of neglect has been incredible. I do apologize!
There is still unpacking and reorganizing to do around here though.
I hope to get things back on track soon.
Until then, what have you been neglecting?
Do you have a blog?
Your housekeeping?
Tuesday, July 6, 2010
Happy Belated 4th!
I get so wrapped up in updating my family blog that I forget to celebrate the holidays with you guys!
I regret that I haven't been at home to participate in the fun domestic things like holiday decorating or BBQing.
Since we are "vacationing", we had to be a little more easy-going.
Instead of grilling, we went to a very yummy burger joint and celebrated America's Birthday at a nearby Army post.
My family was dressed in the appropriate attire and
we made it through the day without a wardrobe change!

We explored the beach and a few moonbounces before we saw an amazing sunset!

We listened to a little music and patiently waited for the fireworks!

We were reminded how wonderful it is to be blessed as American citizens!


I hope that you had a wonderful holiday!
Airblade
I have a long list of things I would love to have if money was no object.
Of course, they are all frivolous things....but, I believe they would be life-changing!
The most recent item I have added to my list is the Dyson Airblade. Have you ever seen one of these at a restaurant or theme park restroom?
It is a hand-dryer. And it is amazing.

I first saw one at Busch Gardens in Williamsburg, VA. I was blown away - ha!
After searching a few websites you will find:
The airblade is super-dooper-expensive!
The airblade will dry BOTH hands in 10 seconds!
The airblade is 80% more efficent than heated dryers!
The airblade removes bacteria with a HEPA filter and is very hygenic!
I cannot express how cool these things are.
Instead of placing your hand under the dryer, you stick your hands straight down and pull up.
The drying process is super quick.
You do not rub your hands to encourage the drying process.
You do not walk away tired of waiting for the heat to dry your hands and use your pants instead.
The airblade completely removes all traces of dampness from your hands.
I am in love.
Should you ever see one in real life and not walk away impressed, I honestly cannot be your friend anymore.
Seriously.
Now if only I could get them in my home...
Wednesday, June 30, 2010
Rocking Redo
First, I would love to welcome my new readers!! Please leave comments so I can get to know my audience! I would love to hear from you!
Several months ago, my grandfather purchased a cherry red rocking chair for my Mere at a flea market.
The chair is toddler-sized and in wonderful condition overall.

The chair had some peeling and chipping paint, which didn't bother the kiddos at all.
I was trying to let the imperfections grow on me, but the Type A side of me began to take over....and a rocking redo began!
I scraped off any of the paint that I could.
The paint that was on the chair wasn't thickly coated, so I sanded the remainder of the chair to smooth everything out. This process actually took away a great deal of excess paint as well!
I let Meredith choose a new color for the chair. I was hoping for her to pick red (to make the repair a lot easier on me), but instead she chose PINK!
We purchased the paint from my favorite blue store - Valspar brand, Satin Spray Paint.

The entire can gave me two coats for the chair. I went slowly, spraying in sections and letting dry before continuing to ensure even coverage.
The spray paint was amazingly easy to use. I love the Valspar paint way more than the other store brands you can purchase in any craft section. The even, smooth coverage was easier to achieve.
I am in love with the end result!

A nice smooth coat of a pale pink!
Thursday, June 24, 2010
Pot Holders
When I was growing up, I used to weave potholders with a square hook and loom contraption. I was always very proud of my beautiful, multi-colored creations and gave them away to family members.
 photo credit
Obviously, they weren't good enough for REAL potholders.
I never realized that at the time.
I also never realized that I would eventually have pot holders in my own home that were "not good enough."
For the past five and a half years, I have broken in a few select potholders.
They folded perfectly around the edges of pans filled with yummy goodness.
They sat lovingly underneath a casserole.
These potholders were well-loved.
Well, they were well-loved by me.
My husband hated them.
What he hated about them was what I loved the most....
So I unwillingly went shopping for new potholders. Coincidentally, that same day, Target was COMPLETELY sold out of EVERY potholder they kept in stock.
I should have taken this as a sign, but instead, I just went to a different store.
I came across potholders that were not like I wanted.
I have grown to love them.
Several months have passed, and I have broken in these glorious pot holders.
And they are even more amazing than the ones I have loved for five years.
They are sold at Bed Bath & Beyond.

They are rectangular in shape.
They have a double opening on one side, so your hand can fit inside - without the cumbersome feel of an oven mitt.
They have neoprene non-slip gripping on the opposite side.
They protect up to 500* F.
They are machine washable.
They are fabulous.
We are super happy with them.
And it goes to show change isn't as bad as you initially think it is.
Do you have anything in your home that your husband hates and you adore?
Have you ever had to try something new because your old favorite was no longer available?
Do tell!
 photo credit
Obviously, they weren't good enough for REAL potholders.
I never realized that at the time.
I also never realized that I would eventually have pot holders in my own home that were "not good enough."
For the past five and a half years, I have broken in a few select potholders.
They folded perfectly around the edges of pans filled with yummy goodness.
They sat lovingly underneath a casserole.
These potholders were well-loved.
Well, they were well-loved by me.
My husband hated them.
What he hated about them was what I loved the most....
So I unwillingly went shopping for new potholders. Coincidentally, that same day, Target was COMPLETELY sold out of EVERY potholder they kept in stock.
I should have taken this as a sign, but instead, I just went to a different store.
I came across potholders that were not like I wanted.
I have grown to love them.
Several months have passed, and I have broken in these glorious pot holders.
And they are even more amazing than the ones I have loved for five years.
They are sold at Bed Bath & Beyond.
Kitchensmart Pot Holders
(Sorry! This is the only photo I could find of them, which includes kitchen towels as well!)
(Sorry! This is the only photo I could find of them, which includes kitchen towels as well!)
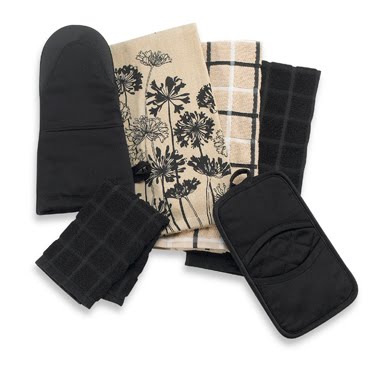
They are rectangular in shape.
They have a double opening on one side, so your hand can fit inside - without the cumbersome feel of an oven mitt.
They have neoprene non-slip gripping on the opposite side.
They protect up to 500* F.
They are machine washable.
They are fabulous.
We are super happy with them.
And it goes to show change isn't as bad as you initially think it is.
Do you have anything in your home that your husband hates and you adore?
Have you ever had to try something new because your old favorite was no longer available?
Do tell!
Sunday, June 20, 2010
Baked Potato Casserole!
You HAVE to try this recipe!
I am always trying to incorporate bacon in my day....
And this recipe hits the spot.
I cannot express how delicious it is....smooth and creamy...rich and flavorful.
Everything you want a potato to be.
Sorry, for no pictures!
Loaded Baked Potato Casserole
(from Southern Living)
Ingredients
1 (22-oz.) package frozen mashed potatoes
1 (6.5-oz.) container garlic-and-herb spreadable cheese
1/2 cup milk
4 cooked bacon slices, crumbled
1 teaspoon salt
1/2 teaspoon pepper
1 cup (4 oz.) shredded Cheddar cheese
Garnish: chopped fresh chives
Preparation
1. Prepare potatoes according to package directions.
2. Stir in spreadable cheese and next 4 ingredients; stir until blended. Spread mixture on bottom of a lightly-greased 11- x 7-inch baking dish; top with Cheddar cheese.
3. Bake at 350° for 25 to 30 minutes or until thoroughly heated.
Friday, June 11, 2010
Broccoli-Cheese Stuffed Chicken
One night, I had some leftover broccoli.
And just like that, I had a super cool plan for broccoli stuffed chicken breasts!
Take your chicken breasts, and flatten them to about 1/4 inch thickeness...

Chop 1/2 cup cooked broccoli

And carefully place in the center of your chicken.....
As much as you see fit.

And don't forget to season your chicken/broccoli.
The essentials, salt and pepper, and maybe garlic powder if you like.

Add a sprinkle of shredded cheese.
Mozzerella is what I chose!
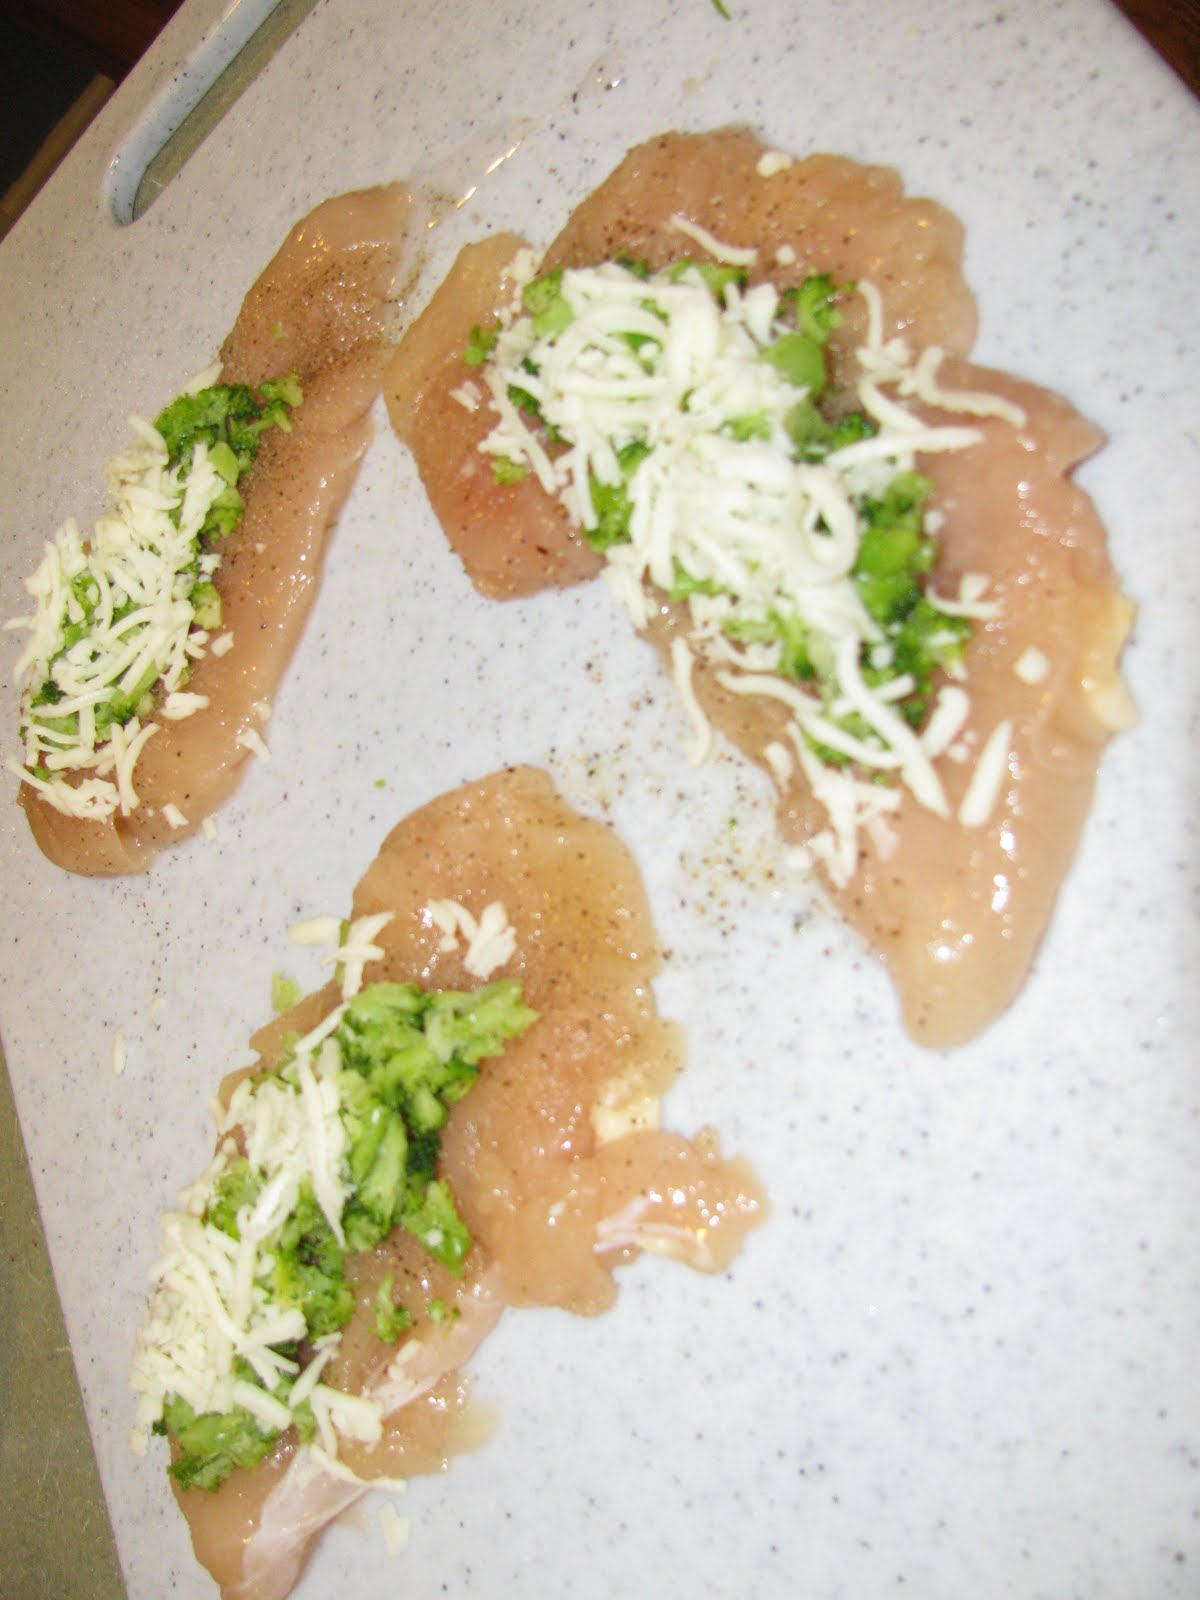
Roll your chicken, carefully tucking the sides.

Take your favorite breadcrumbs.
If you just have plain breadcrumbs, add Italian seasoning.

Roll your chicken in the breadcrumbs.
Bake in a greased baking sheet for about 20 minutes or until the juices run clear!
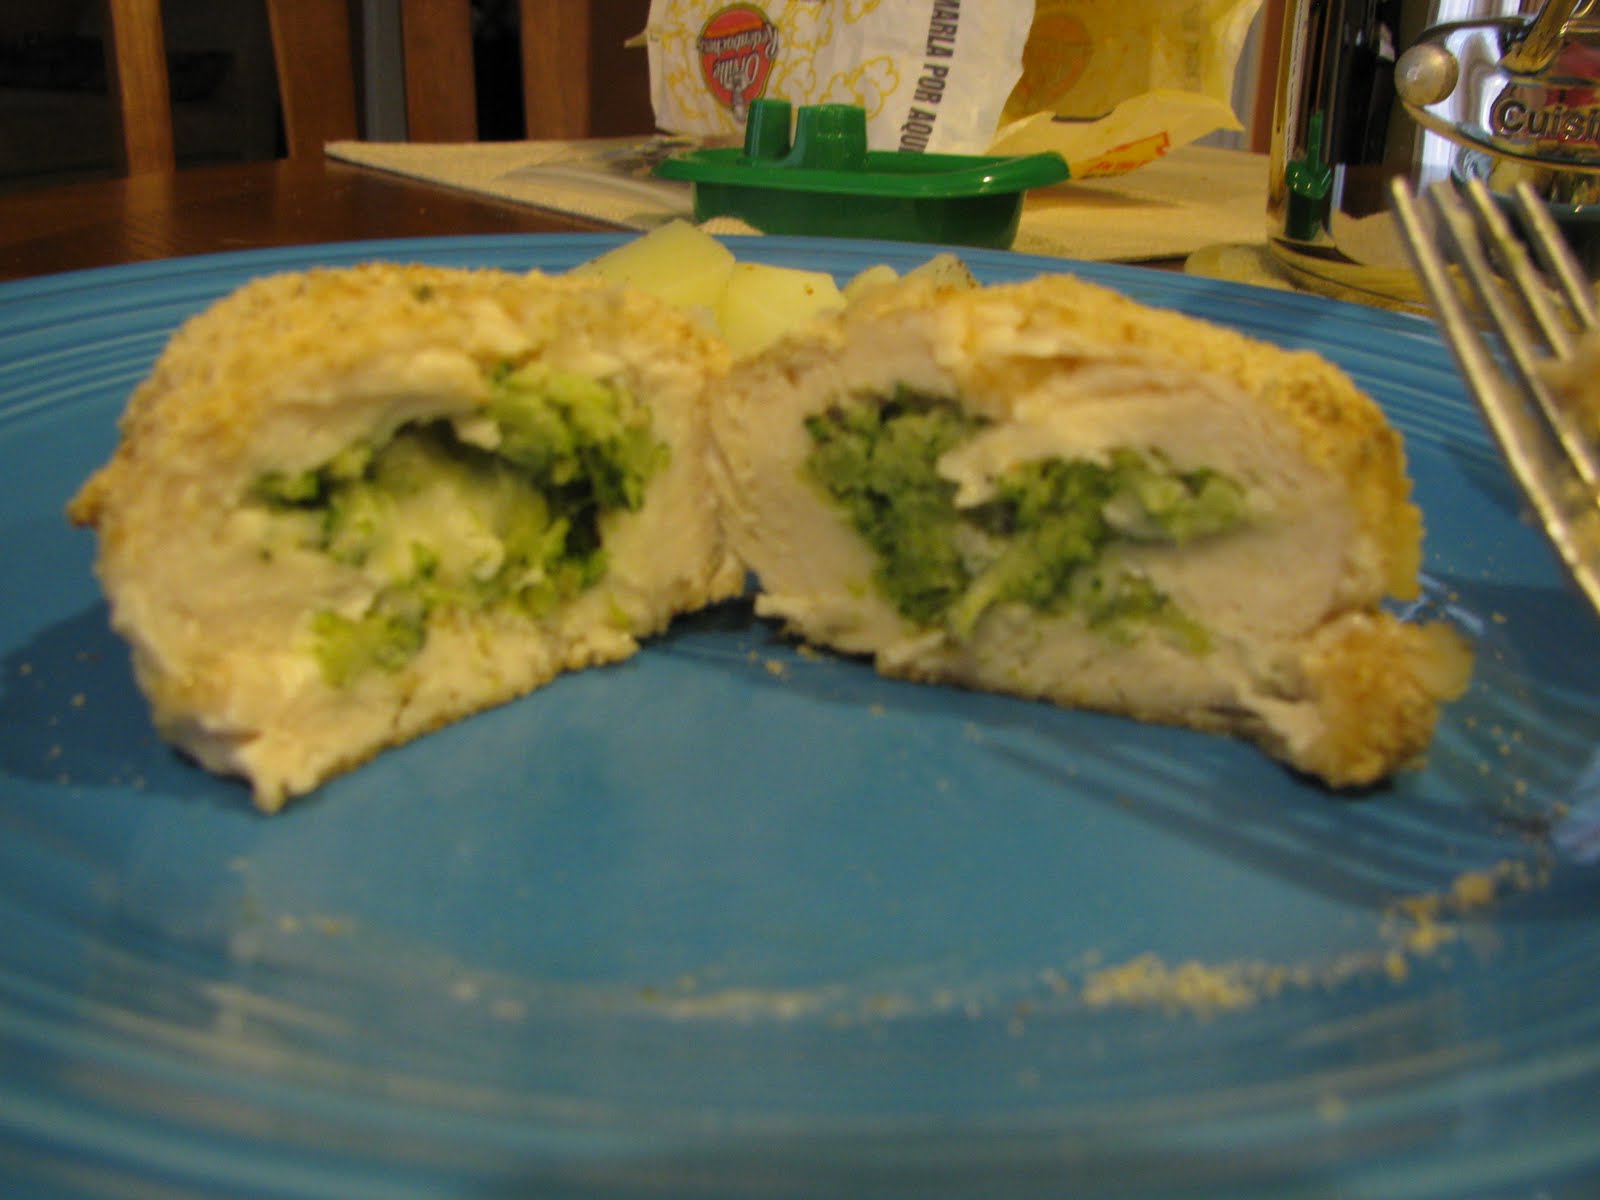
You will have this...

and this....
(please excuse the boat and the empty popcorn bag. i don't claim to be a professional food stylist.)
Serve along side your favorite potato or rice!
Enjoy!
Subscribe to:
Posts (Atom)
LinkWithin
